With the purchase of a second-hand Amiga 500 with a mouse and two joysticks from a reseller today, thirty years after the purchase of my first Amiga 500, I now had the opportunity to experience the unboxing process, to hear that satisfying Amiga floppy disk drive click as I load all my old 3.5 inch floppy disks from the 1990s onto a real Amiga 500 computer.
The last time I knew how to set up an Amiga 500 computer was when I was fourteen. The Amiga 500 computer components were all familiar to me. I had a sense of what I needed to do. However, I found there would be some trial and error, which in this day and age, a quick Google search would resolve.
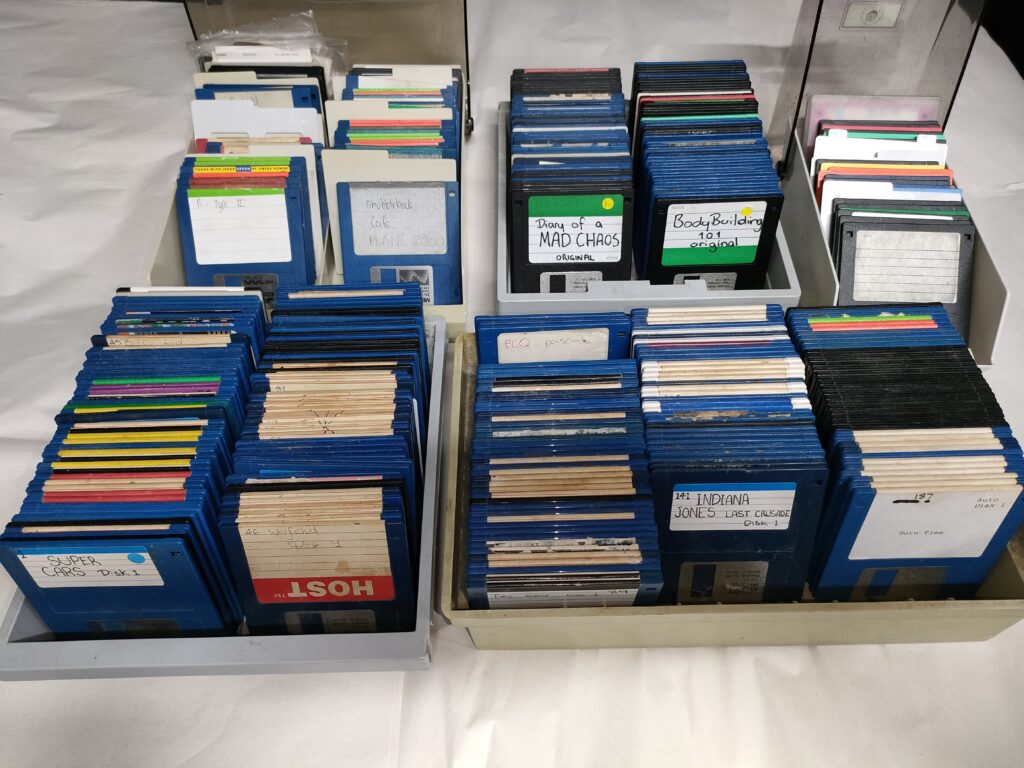
I frequently came in and out of the bedroom to grab all of the 3.5 inch floppy disks from under the bed. There were three floppy disk cases worth of games that I fetched from under the bed. When combined with the seller’s floppy disk case, there were more than two hundred and fifty Amiga-formatted 3.5 inch floppy disks to test once the Amiga 500 was set up.
I also found my old Amiga 500 power box, as well as the audio video in out connector (Amiga A520 TV Modulator). I couldn’t believe that I still had those two items from the A500. Now I have a backup power box in case the one that I have purchased today blows up for some reason. The backup Amiga A520 TV modulator also comes in handy.
I uncovered a few more relics from the 1990s, namely an old cassette tape with my name on it. That would need a cassette tape player, which are far easier to find than a second-hand Amiga 500.
Connecting An Analog Television
It was time to learn how to set up the Amiga 500 again. The television had to be connected to the Amiga 500. I ran a TV antenna extension cable to the digital TV. I felt like Doc Brown from Back To The Future at the clock tower when I realized the extension cable was not long enough.
To the shed I darted to rummage through an old computer peripherals box, stuffed with cables, cords and plugs that dated back decades. I found all kinds of cool stuff in there.
There was a 56k internal PCI modem in the box, still in mint condition.
I also discovered a 3.5 inch floppy disk single tray case, which had at least 20 3.5 inch floppy disks in there. I grabbed these relics, plus a USB cord, and brought them back into the house to continue setting up the Amiga 500 computer.
The TV antenna now reached the TV. Hooray! However, I could not test the Amiga 500 display because the TV still was not connected to the Amiga 500 at that time. I needed to find a TV with analog connections. Luckily, there was an old analog TV in the garage, but I could not find its power cord.
Back I darted to the old computer peripherals box in the shed. I found the power cord in there. I grabbed that. I felt like I was in a game of Monkey Island, where you need to find one item, then use that item on another item to open up a third item, that helps you to get into a fourth item. I was playing Monkey Island trying to get my A500 to work.
When I brought the TV power cord back into the garage, I connected the television. The analog TV worked! I was able to go to my next step of the Amiga 500 set up.
Advice From Fellow Amiga Heads
Meanwhile, I chatted over Facebook Messenger to my best friend who also owned an Amiga 500 back in the day. I showed him some videos and photos of the second-hand Amiga 500 I purchased earlier today. He was excited to see the Amiga 500.
He gave me some pointers on how to set up the Amiga 500.
“Do you remember how to load up a floppy disk? You’ve got to put a Dos disk in and type dos.”
“Oh really? I forgot about that.”
It’s good to have Amiga friends to rely on for advice. It should help my learning curve with the Amiga 500. In hindsight however, I should have known that he might have been referring to MS-Dos rather than AmigaDos. But, hey, thirty years is a long time for the memory.
Troubleshooting An Amiga 500 Computer Setup
In the next few hours I was able to slowly assemble the Amiga 500 workstation piece by piece.
I started to unpack the Amiga 500 and TV onto a wooden bench. Part by part I began to unpack the peripherals from the original Amiga 500 box.
That is where the troubleshooting began.
Originally, I had run a television antenna cord from the bedroom to the garage, assuming that the TV antenna is required to power the Amiga 500 display. But when I came online to read the Amiga 500 User Guide, I saw that a TV antenna is not required.
Connecting An Amiga A520 Modulator To Analog TV
I became confused at some point with how to set up the Amiga A520 TV modulator because it had 3 plugs that can be connected to it. It has an audio in as well as a video out beside each other on the right side of the modulator. Then there is an RF out at the back of the modulator.
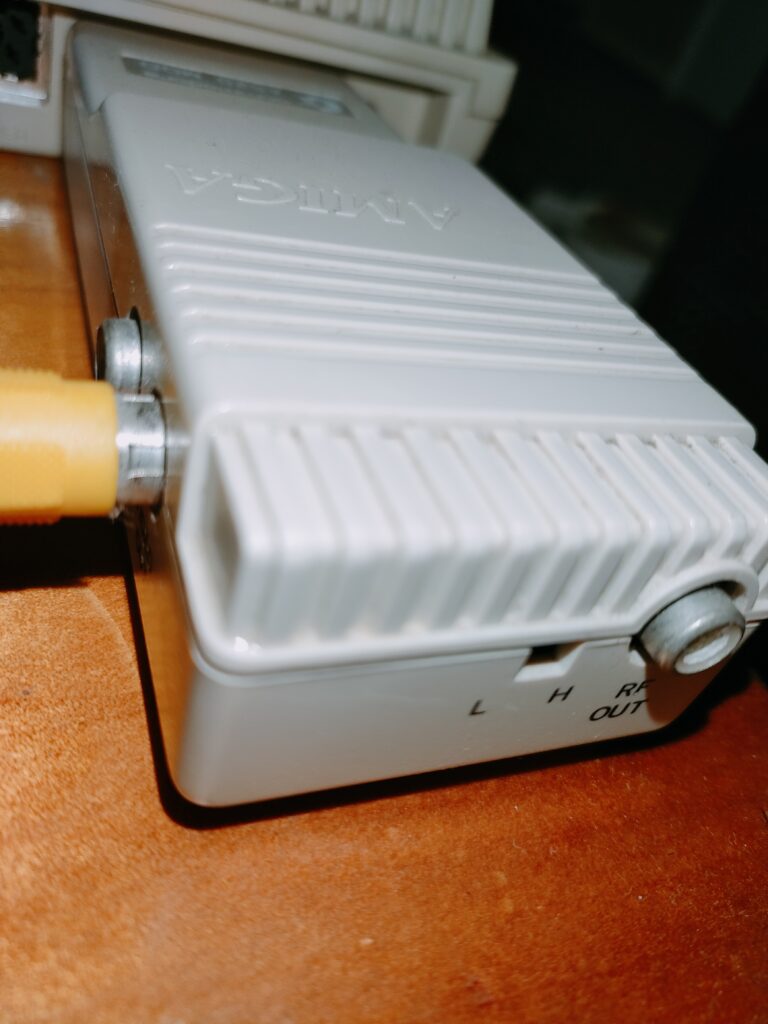
I didn’t know exactly how they all connected.
My first rookie mistake was to plug in the antenna cable to the RF out. Nothing happened.
Secondly, I figured the audio cables needed to run from the R-Audio L-Audio on the back of the Amiga 500 computer to the mono audio cable on the Amiga 520 TV modulator audio in socket. Nothing happened.
Thirdly, I guessed I needed to run the antenna cable from the Amiga 520 TV modulator video out socket to the television antenna socket. Nothing happened, again.
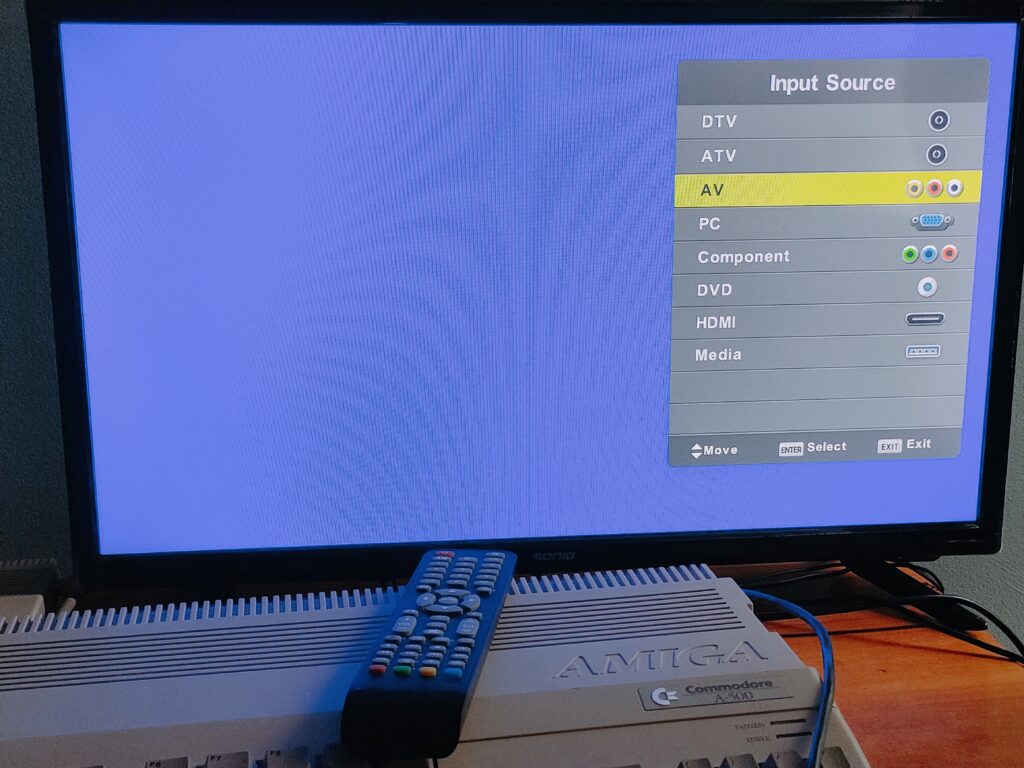
Once I did a quick check online, I realized that I could connect an RCA cable, which has 2 audio and 1 video plug on either side. I connected the video plug of the RCA cable to the video-out port of the Amiga 520 TV modulator. The other side was connected to the TV video input.
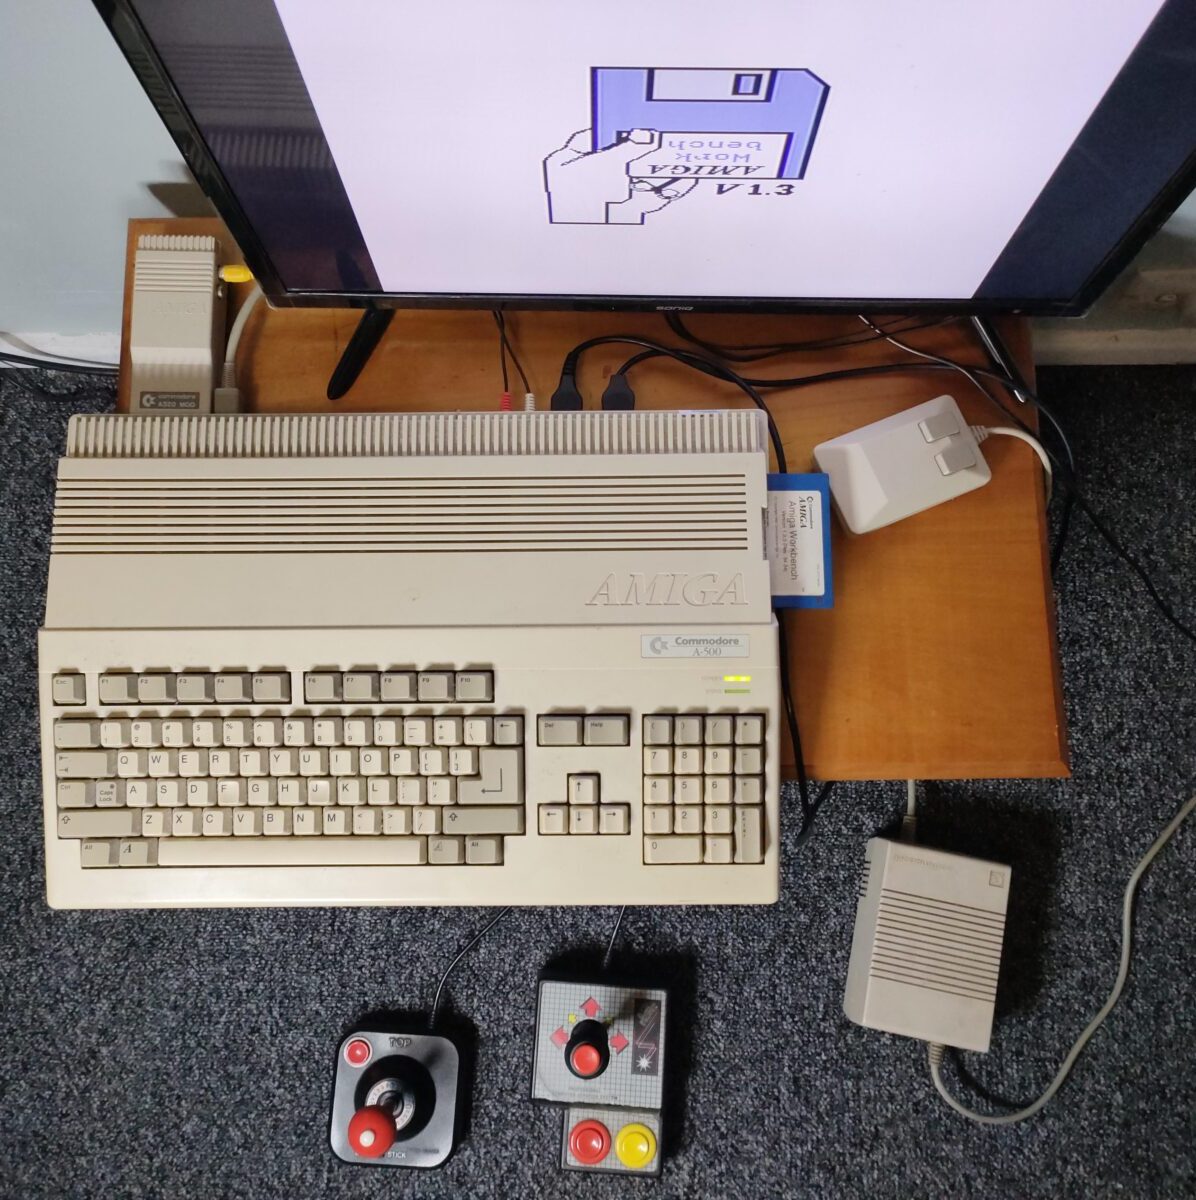
Once I knew how to connect the RCA cables, I changed the television input to the AV2 channel and turned the Amiga 500 on to finish the set up. Then… I was amazed to hear the slow clicks.
Click, click, click.
Then the Amiga 500 disk icon popped up on the screen.
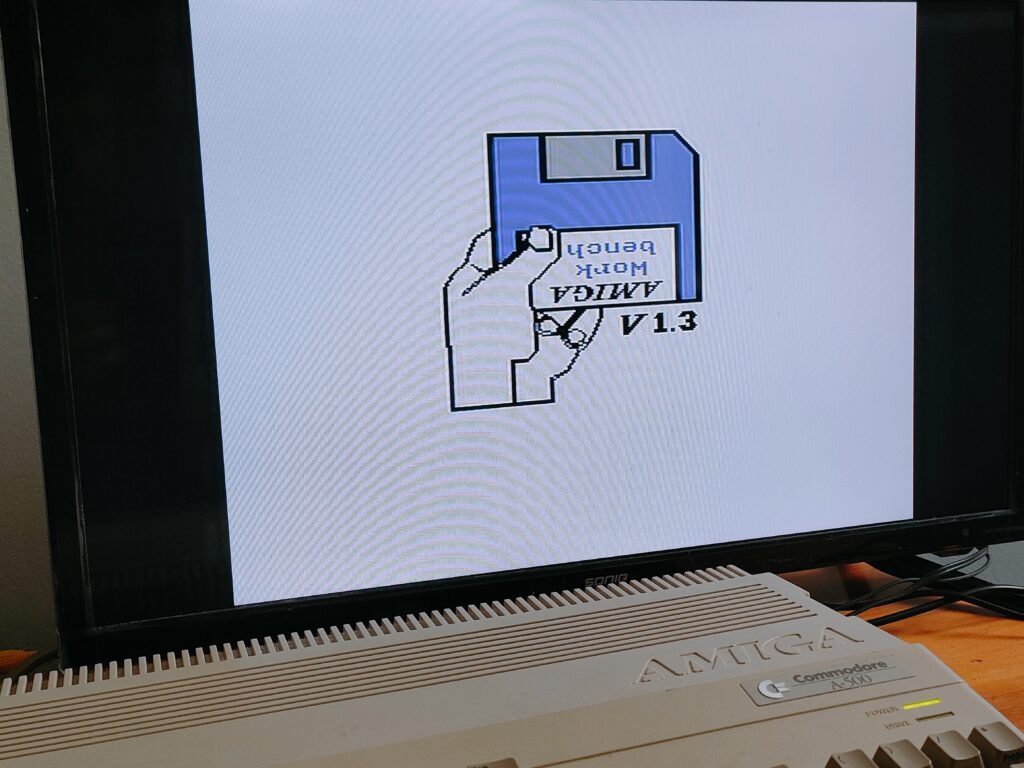
I had video! The Amiga 500 worked! As I was sitting there in the silence, the only thing I could hear was the click of the Amiga 500 floppy disk drive every few seconds. It was just beautiful to listen to that.
Then I heard a helicopter overhead.
I thought, “Wow! Look how far technology has gone!”
With the Amiga floppy drive clicking patiently in the background, I eyed my collection of Amiga 500 computer games sitting untouched for thirty years in their floppy disk cases. The first game that I tried to load up was Super Cars, but, that is a story for another day.
How To Set Up An Amiga 500 – Summary
To wrap up, the assembly of an A500 computer connected to an analog TV was quite simple.
Powering The A500
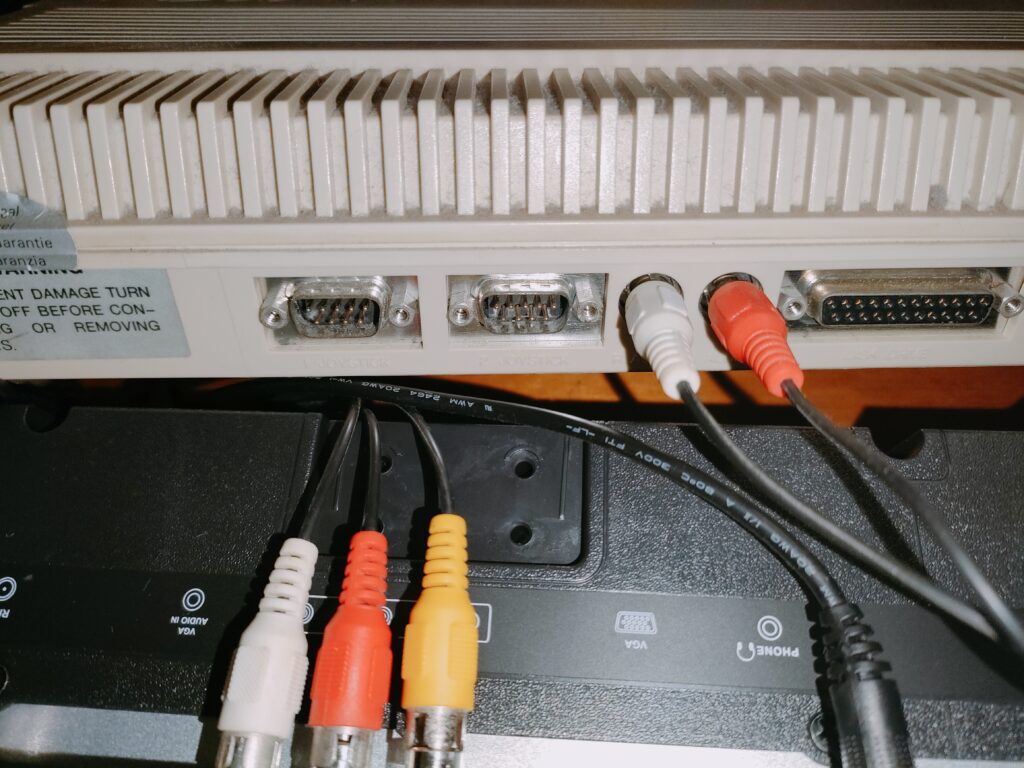
The Amiga 500 power box plugs into a power socket. The power box’s 5-pin cable plugs into the power port on the back of the Amiga 500.
Connecting A500 Audio/Video
First, plug Amiga 520 TV modulator into the 23-pin RGB video port located at the back of the Amiga 500.
Second, use an RCA cable. For video, plug the RCA video cable between the Amiga A520 TV modulator’s video out port and the TV’s video input. For audio, plug the pair of RCA cables into the Amiga 500’s audio ports (R audio L audio), and plug the other end of those cables into your television’s audio inputs.


Diary Of A Mad Chaos is a daily diary written from March 1996 until today, of which individual books and book series have been created, namely “The Lost Years” an exploration of young, entwined love, the “Wubao In China (猎艳奇缘)” book series which provides an extensive comparative analysis of the cultural differences between Eastern and Western societies, and the book titled “Foreigner (华人)” an exploration of race relations in Australia.